This is a guide on how to populate your JSON file containing your Jagex Account information if your browser is getting stuck on the bot detection. This is a hard method to complete but I will do my best to make it as easy as possible. IT IS IMPORTANT TO NOTE: DO NOT SHARE ANY OF THE DATA WE COLLECT, ANYONE WHO HAS ACCESS TO THESE TOKENS AND SESSION IDS HAVE ACCESS TO YOUR ACCOUNT!
ALSO IF YOU HAVE ACCOUNTS POPULATED IN YOUR "jagex_accounts.json" file, you risk messing up the data and not being able to log in. Make sure you understand what you are doing first before AND BACKUP YOUR ACCOUNT FILES IN CASE THIS HAPPENS. It only takes 1 missed comma or one typo (accountID instead of accountId) to make the launcher not accept the values!
What we will be doing:
Getting the JSON file ready.
Loading the Runescape Launcher
Downloading/Running a program to watch incoming/outgoing web traffic to grab the data the Launcher is receiving from the Jagex website.
Signing into your Jagex Account in the launcher
Populating the JSON file with the data we receive from the web traffic program
Step 1:
Go to your EpicBot folder. For Windows users its C:/users/YOUR_USERNAME/EpicBot.
If you don't already have a file called "jagex_accounts.json" in the main folder:
Open up a text document.
Click "Save As"
Navigate to your EpicBot folder.
Select "All Files" in the drop-down menu "Save as type"
Then type the file name "jagex_accounts.json"
Open up the file and we will start with a template for our code. NOTE: if you already have accounts populated do not delete them and read just below this step for how to format it for multiple accounts! (AND MAKE SURE TO BACK UP THE FILE!!!)
[
{
"sessionId": "",
"password": "YOUR_PASSWORD",
"token": {
"token_type": "bearer",
"issued_at": 0,
"scope": "",
"refresh_token": "",
"access_token": "",
"expires_in": 1800,
"id_token": ""
},
"autoLogin": false,
"authSeed": "",
"rsAccounts": [
{
"displayName": "Anything you want",
"accountId": ""
}
],
"email": "YOUR_EMAIL"
}
]
You can copy this template and paste this in your jagex_accounts.json. Edit the parts that says "YOUR_EMAIL" to the email you are using and "YOUR_PASSWORD" to the password to the account. Keep this open, as we will be editing the values in later steps.
If you have multiple accounts, you separate them with commas in between inside the square brackets. Here is an example:
[
// THIS IS THE OLD ACCOUNT DATA, YOU DO NOT WANT TO MESS WITH THIS
{
"sessionId": "35325agfadsgsa3452",
"password": "FIRST_ACCOUNT_PASSWORD",
"token": {
"token_type": "bearer",
"issued_at": 1712249047000,
"scope": "offline openid user.profile.read user.entitlement.read gamesso.token.create user.sku.read user.game.read",
"refresh_token": "feafeafafafafaevadvdsvaefea",
"access_token": "ereafeafavdsfavfewaefaefaefa",
"expires_in": 1799,
"id_token": "fdafasdfadsfsafasdfasdfasdfasdfasfa"
},
"autoLogin": false,
"authSeed": "",
"rsAccounts": [
{
"displayName": "PREVIOUS_ACCOUT_NAME",
"accountId": "111111111111111"
}
],
"email": "YOUR_OTHER_ACCOUNTS_EMAIL"
},
// THIS IS THE NEW DATA WE ARE ENTERING, NOTICE THE COMMA ABOVE BEHIND THE CURLY BRACKET
{
"sessionId": "",
"password": "PASSWORD",
"token": {
"token_type": "bearer",
"issued_at": 0,
"scope": "offline openid user.profile.read user.entitlement.read gamesso.token.create user.sku.read user.game.read",
"refresh_token": "",
"access_token": "",
"expires_in": 1799,
"id_token": ""
},
"autoLogin": false,
"authSeed": "",
"rsAccounts": [
{
"displayName": "NEW_ACCOUNT_NAME",
"accountId": ""
}
],
"email": "YOUR_EMAIL"
}
]
Step 2:
Download the Runescape Launcher off the website (Download the Jagex Launcher - RuneScape). If you already have the launcher, make sure you log out of your account.
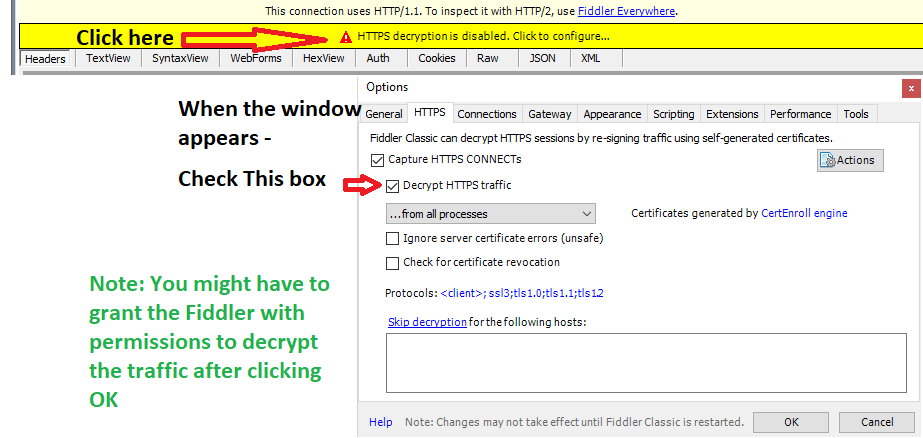
Step 3:
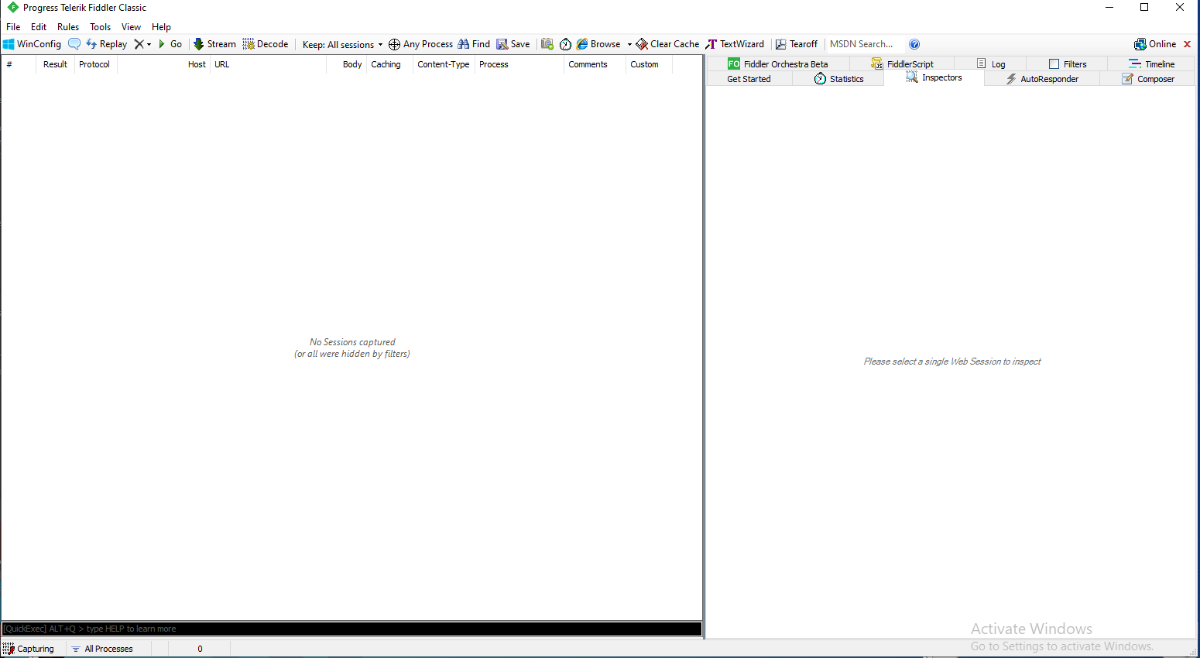
Next, we need a program to watch the all the web traffic on our computer. I'm using Fiddler classic but there are other options you can use. (https://www.telerik.com/download/fiddler). Make sure the program is up and running before going to the next step.
Step 4:
Sign into your Jagex Account (ON THE JAGEX LAUNCHER)
Step 5:
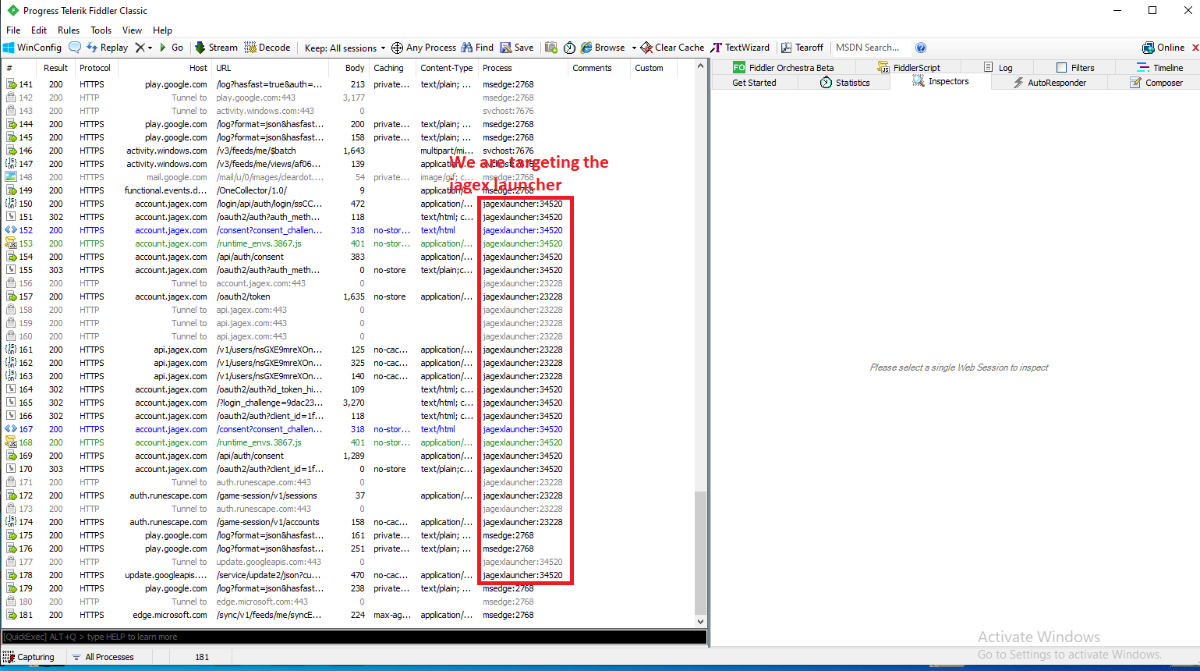
Next we need to locate the data in Fiddler. There are multiple values we need to get in order to get it to work. So make sure to double check all of them in this step.
In our Fiddler program we should have a bunch of data sent and received from the Jagex Launcher.
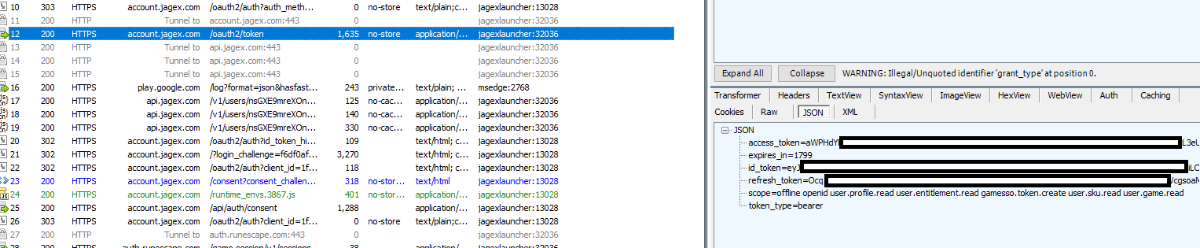
We can cycle through these and find the values that we need to insert into the template section of the json file we created. The first ones we will target is the Tokens. Cycle through the options with the process name Jagex Launcher until you see one with the data on the right looking something like the following: (Make sure on the bottom right side you are looking at the JSON data)
You will need to copy the values of the Access token, id token, refresh token and scope into your JSON file template. For Example If you are inserting the access_token then go to your json file and where it says "access_token": "", change that to "access_token": "awPHdYPjc9e",.
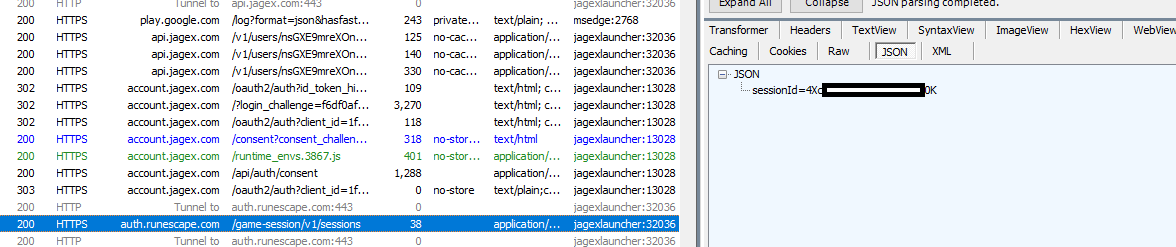
The next value we need is the session id. Cycle through the different processes until the data in the JSON tab shows "sessionId" like below.
Copy that value into your JSON file like in the above step.
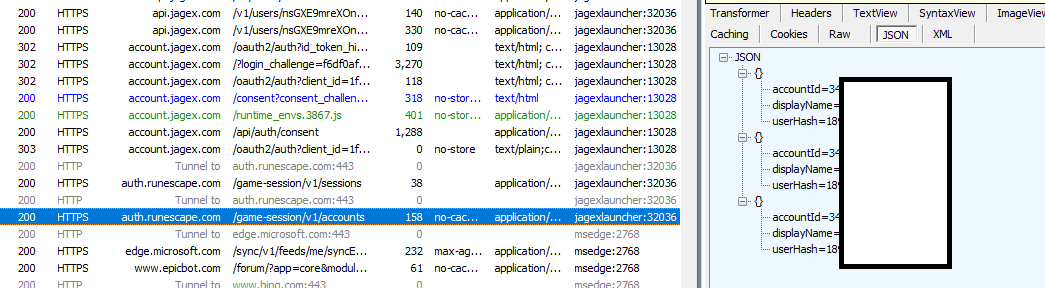
Next we need to find the account ids linked to the Jagex Account. Again, cycle through our options from the jagex launcher in Fiddler. It should look something like this: (NOTE: it could be longer or shorter than this example based on how many accounts you have linked. In this example I have 3 accounts so there is 3 sets of data.)C
Copy the accountId to your JSON file just like the above steps. The displayName is only shown on the welcome screen and doesn't really matter. You can copy this or name it "Bot1" or whatever you want. If you have multiple accounts you use the following format in your JSON file to get it to show under rsAccounts:
"rsAccounts": [
{
"displayName": "Anything you want",
"accountId": "111111111"
},
{
"displayName": "Anything you want",
"accountId": "222222222"
},
{
"displayName": "Anything you want",
"accountId": "3333333333"
}
],
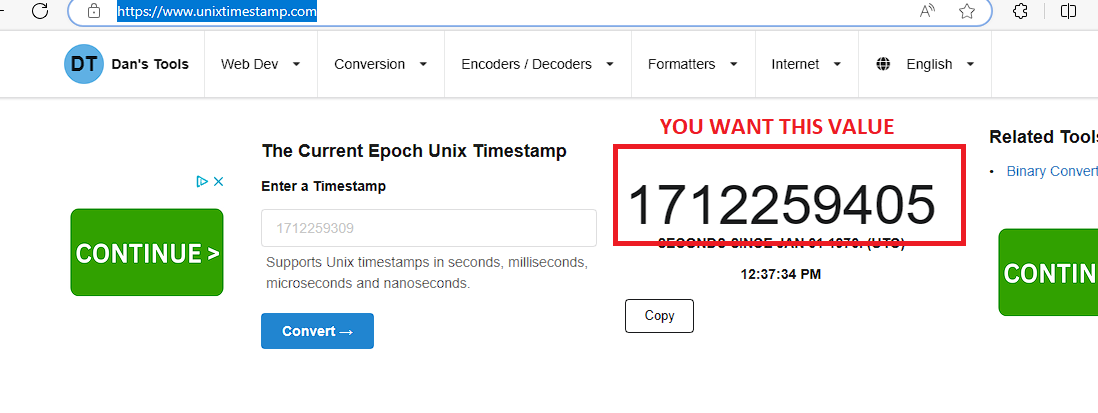
Lastly, we need to set a timestamp of when the tokens were created. Not sure if this is necessary but I did it just to be safe. You can get the value at Unix Time Stamp - Epoch Converter then copy the value like below and put it for the value of "issued_at" in your json file (NOTE THERE ARE NO QUOTES AROUND THE VALUE HERE)
Finally save your JSON file if all values are filled in your epicbot folder and refresh the loader. Your accounts should launch now! Happy botting.